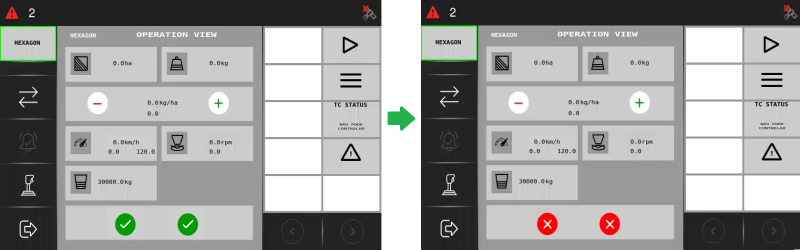
Operation View
After setting up the initial configurations, you can begin the operation. However, it’s important to familiarize yourself with the operation view and its widgets before proceeding.
-
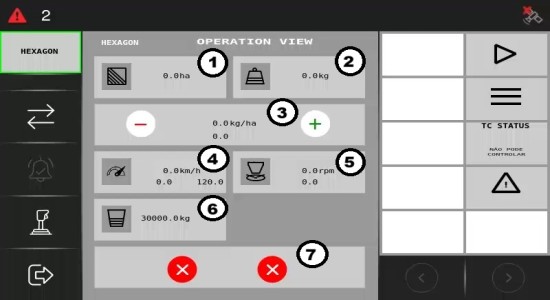
Covered area: Shows the extent of land covered during a given application.
-
Total applied: Shows the total volume of the input applied across the covered area.
-
Prescription and rate feedback: Provides recommended settings for effective input application.
-
The first line displays the calibrated input selected for this application. In the example below, Input 1 has been calibrated and selected.
-
The second line indicates your target rate, where you should specify the desired dosage to apply.
-
The third line shows the real-time rate being applied during that specific period.
-

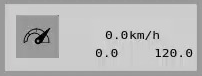
4. Application range: A non-editable field that refers to the effective area within which the equipment can apply the input accurately at a certain speed. The first value in km/h indicates the current speed, while the other values represent the minimum and maximum speed you must drive to apply the current target dose.
5. Target and disk reading: Offers guidelines for applying inputs effectively. For instance, in the example below, the target speed is set at 300.0 rpm, which is the desired speed for operation. The disk reading indicates the actual speed; if it shows 0.0 rpm, it means the equipment is stationary. The goal is to achieve the target speed of 300 rpm for optimal performance.

6. Tank level: Shows the tank level and leads you to the Tank configuration page.
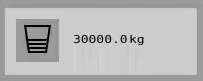
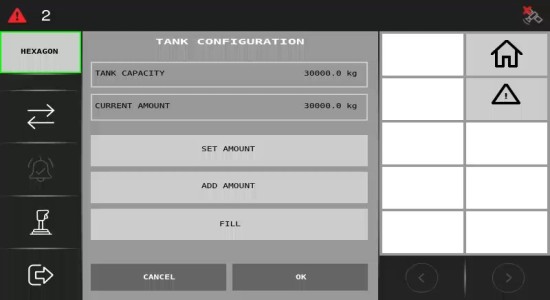
On the Tank configuration page, you can view the tank's capacity, fill it, and add or set the desired amount (in kilograms) in the tank.
-
Tank Capacity: View the current capacity of the tank.
-
Current Amount: Display the amount currently in the tank.
-
Set Amount: Configure the desired quantity in the tank.
-
Add Amount: Add a specific quantity to the tank.
-
Fill: Completely fill the tank to its maximum capacity.
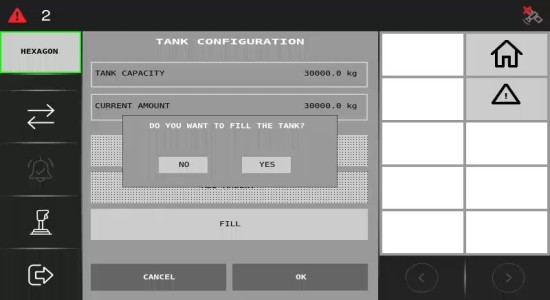
To set or add an amount, click the appropriate button (Set amount or Add amount) and enter the desired number. To fill the tank, press the Fill button.
Once you press Fill, a pop-up message will prompt you to confirm the action. Click Yes to proceed.
7. Section control: There are two section control modes: manual and automatic modes. In manual section control, the operator determines which sections to turn off. It is possible to open or close sections at any time, regardless of the state of the other sections, such as closing a section between two open sections.
Refer to the section icons below to check whether the sections are on or off, either manually or automatically.
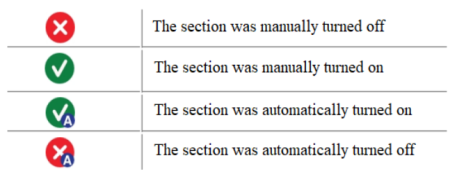
To manually control the sections, press the red icon to turn a section off or the green icon to turn it on and keep it open.